
Our STL & 3MF splitting features
Five ways to cut a 3D model into printable parts, and connectors you can add to any of them so the parts go back together. Everything runs locally, with no signup, no install, and no file uploads.
Multipart3D is a free browser tool for splitting 3D models before you slice them. Slicers such as Bambu Studio, Orca Slicer, PrusaSlicer, and Cura can place a single flat cut, but they stop there. Multipart3D adds bounded cuts, interlocking dovetail joints, click-to-detach for features, color-aware splitting of painted 3MF, and connector placement on the cut faces, all without opening Blender or a CAD package.
Each tool below has its own page with screenshots, step-by-step instructions, and tips for printable results. Use this overview to decide which cut fits your model, then read the detail page when you are ready to try it.
Five ways to cut a model
Planar, Area, Dovetail, and Smart Detach work on both STL and 3MF meshes. Separate by Color needs a painted 3MF, because STL files carry no color information. Whichever tool you use, the parts export as STL or 3MF for your slicer.
Planar Cut
STL and 3MF
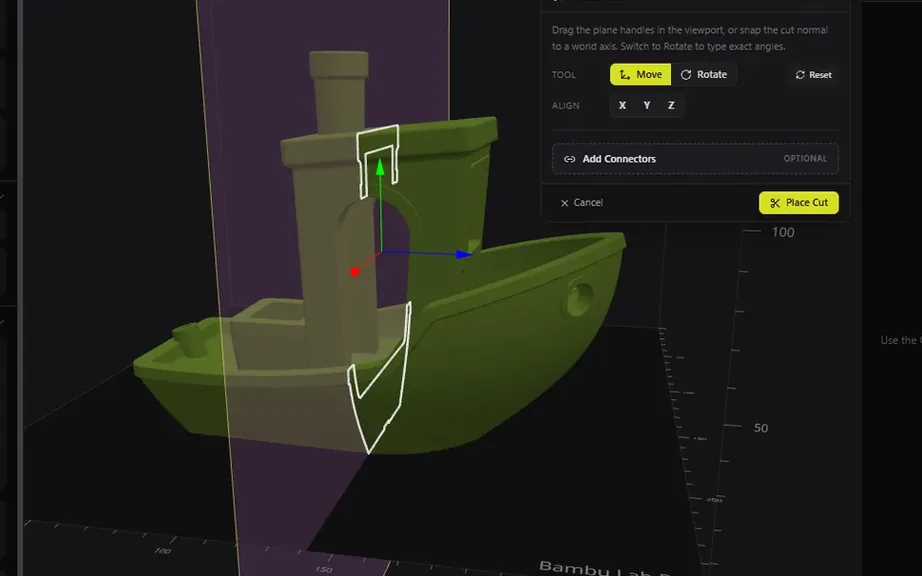
Slice clean through the model with a flat plane. This is the classic split when you need a straight, predictable seam.
Position a cutting plane anywhere on an STL or 3MF, preview both sides, and commit. The two halves land in the parts list with flat mating faces, ready for dowels, plugs, or magnets. It is the fastest way to make an oversized model fit your build volume or to split a print for cleaner layer lines.
Best for models taller or wider than your printer, two-piece splits, straight glue seams.
Planar Cut guideArea Cut
STL and 3MF
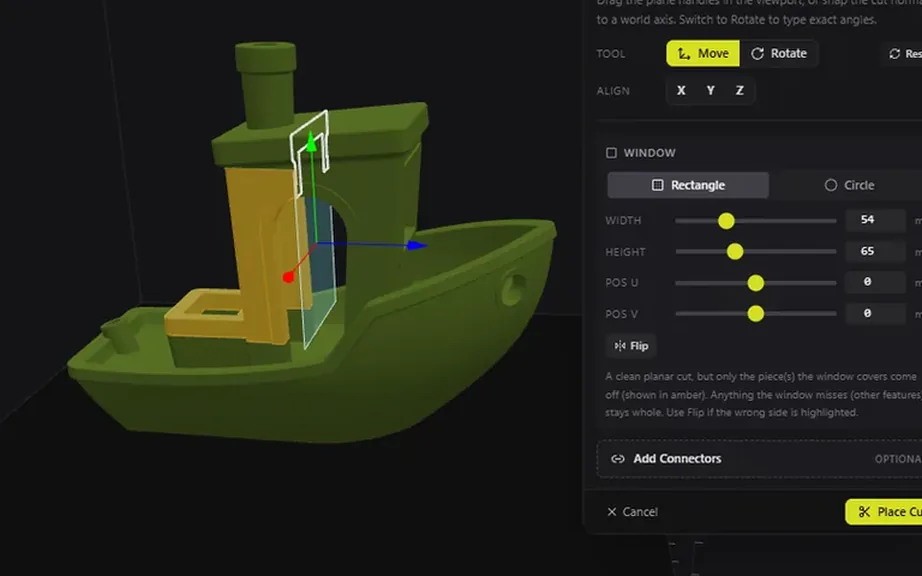
Cut only inside a rectangle or circle on the plane. Reshape a region without splitting the entire mesh.
Area Cut is a planar cut with a window. Draw a rectangle or circle on the plane and only the geometry inside it is separated; the rest of the mesh stays in one piece. Use it to lift a hatch, panel, or insert off a surface, or to isolate a spot for a connector without a full bipartition.
Best for removable panels, local inserts, surgical edits where a full plane would cut too much.
Area Cut guideDovetail Cut
STL and 3MF
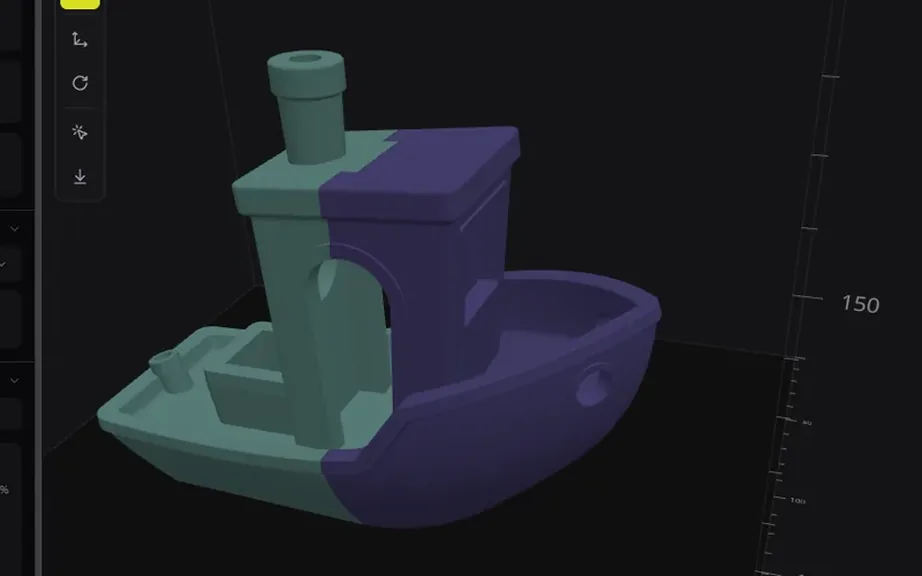
Interlocking teeth that slide together and lock. The seam helps parts self-align.
Dovetail Cut turns a split into a joint. Instead of two smooth faces, the seam gets interlocking teeth that guide assembly and resist shear, so large props and cosplay pieces line up the same way every time. Tooth size is adjustable to match your printer’s tolerance, and the joint is generated for you rather than modeled in CAD.
Best for large props, helmets, and structural parts that must self-align before glue.
Dovetail Cut guideSmart Detach
STL and 3MF
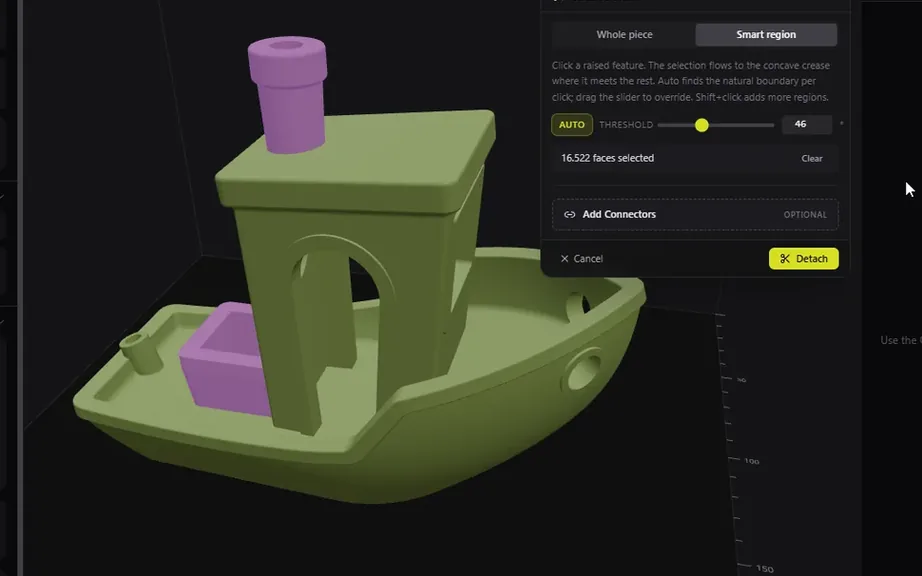
Click a feature and peel a whole piece off cleanly. Built for parts that should print separately.
Smart Detach follows the shape of the model instead of a plane. Click an arm, horn, chimney, or accessory and the selection floods across that feature up to its natural boundary; a threshold lets you tighten or widen the flood. The clicked piece becomes its own part, so you can print it flat with fewer supports or make a fragile detail replaceable.
Best for protruding details, accessories, and anything that prints better on its own.
Smart Detach guideSeparate by ColorBeta
Painted 3MF only
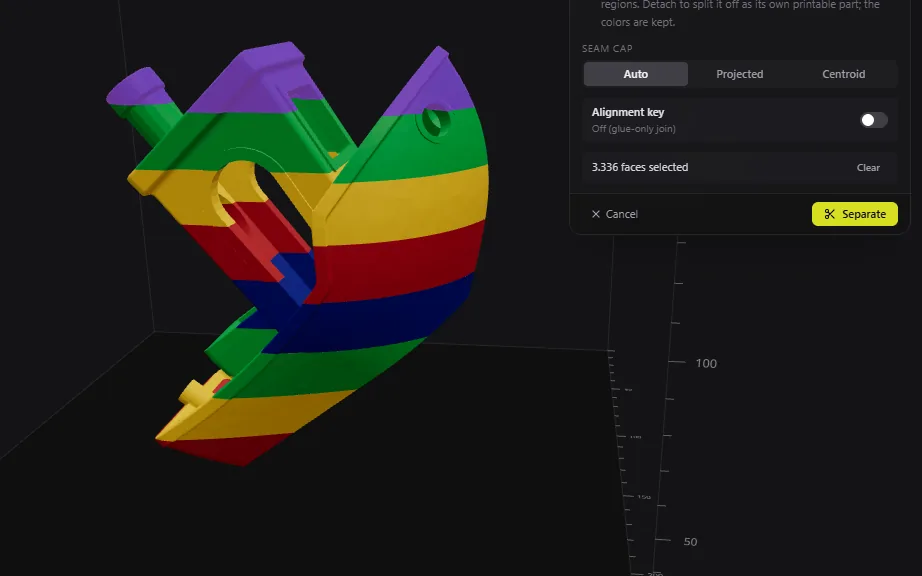
Import a painted 3MF, click a color, and detach that region. Useful for multi-material workflows without redoing paint in CAD.
Open a 3MF you painted in Bambu Studio, Orca Slicer, or PrusaSlicer and the colors load with the mesh. Click a paint region and Multipart3D detaches it as a separate part, with colors preserved on export where the format supports it. That makes multi-color and multi-material prints possible without repainting the mesh, and separate parts can be printed one color at a time on a single-extruder printer.
Best for painted 3MF files, filament swaps, armor-versus-skin splits on miniatures and busts.
Separate by Color guideConnectors, available after every cut
Connectors are not a separate cutting method. Once a model is split with any of the five tools above, you can click the mating faces to add alignment and locking hardware before you export.
Connectors & joints
After any cut
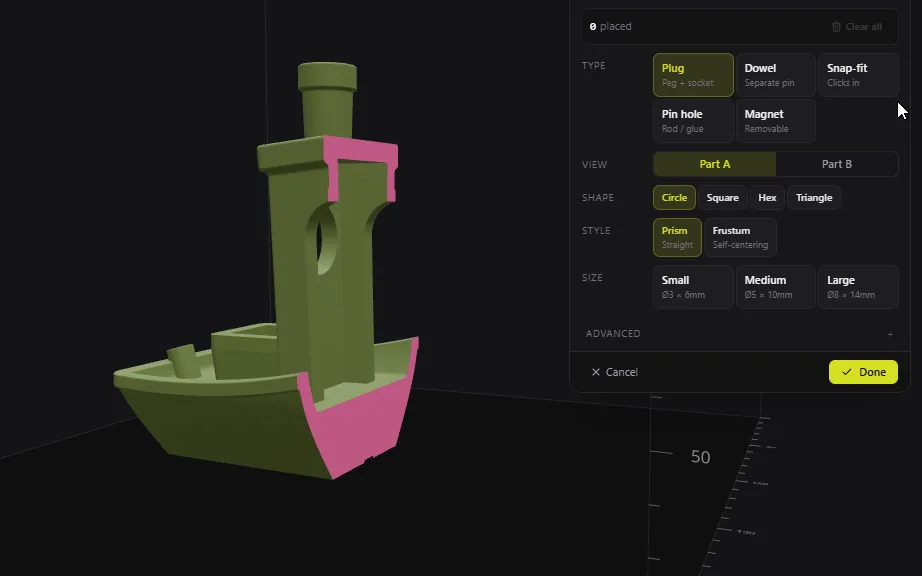
Split parts are only half the job. Connectors help them go back together the way you intended.
After any cut, click the mating face to place plug, dowel, snap-fit, pin-hole, or magnet connectors. Plugs and dowels come in circle, square, hex, and triangle cross-sections; magnet pockets use presets such as 6×3 and 8×2 mm. Tolerance presets for FDM and resin (tight, standard, loose) mean the parts dry-fit before glue instead of after sanding.
Best for aligning glued halves, remountable accessories, dry-fit assemblies.
Connectors & joints guide- Plug
- Dowel
- Snap-fit
- Pin hole
- Magnet
Which cut should I use?
Most models only need one of these. Start from the problem you are trying to solve, not from the tool.
- The model is too big for my build plate
- Use Planar Cut. A flat plane gives the most predictable seam and the largest flat faces for connectors. Add a dovetail instead when the halves must self-align.
- I want the two halves to lock together, not just touch
- Use Dovetail Cut. Interlocking teeth carry the alignment for you, which matters on large props, helmets, and anything that ships or travels in pieces.
- I only need to remove or reshape one region of a surface
- Use Area Cut. The rectangular or circular window limits the cut to the area you choose, so the rest of the mesh stays whole.
- An arm, horn, or accessory should print as its own part
- Use Smart Detach. Click the feature and the selection follows its natural boundary. No plane to position, and the piece can be laid flat for fewer supports.
- I painted the model in my slicer and want one part per color
- Use Separate by Color. Separate by Color turns painted 3MF regions into meshes so you can print colors or materials as separate parts.
- The parts are cut but I need them to align and stay together
- Use Connectors & joints. Plugs, dowels, snap-fits, pin holes, and magnet pockets are placed on the cut face with FDM- and resin-friendly tolerances.
A typical split, start to finish
Whatever the cut, the workflow is the same and stays inside one browser tab.
- Drop an STL or 3MF onto the page. The mesh is read locally; nothing is uploaded.
- Check the build-volume overlay to see whether the model, or its future parts, fit your printer.
- Pick a cut (planar, area, dovetail, smart detach, or separate by color), preview the result, and commit.
- Move parts apart to inspect the seam, then drop them to the bed so each one has a printable base.
- Add connectors to the mating faces if the parts need to align or remount.
- Export each part as STL or 3MF and slice them in Bambu Studio, Orca Slicer, PrusaSlicer, or Cura.
Also included
Smaller capabilities that make the cuts above practical for real prints.
- STL and 3MF import and export
- Load classic STL meshes or 3MF files, including painted 3MF from Bambu Studio, Orca Slicer, and PrusaSlicer. Export parts in either format.
- Build-volume overlay
- A printer-sized box in the viewport so you can judge whether parts will fit before and after a cut.
- Parts list and per-part export
- Every cut or detached piece shows up as its own part. Export one part, or all of them, in one click.
- Move, inspect, and drop to bed
- Pull halves apart to inspect the seam, then place each part flat on the bed so it is ready to slice.
- Tolerance presets
- Connector clearances for FDM and resin (tight, standard, loose) or a custom value for your printer and filament.
- Private by design
- No account, no upload, no server-side processing. Files stay in the browser tab you opened, so client and commercial work is safe to cut here.
Questions about the tools
What is the difference between Planar Cut and Area Cut?
Planar Cut slices the whole model along a flat plane and produces two halves. Area Cut uses the same plane but only cuts inside a rectangle or circle you draw on it, so a single region comes off while the rest of the mesh stays in one piece.
When should I use a dovetail instead of a flat cut with connectors?
Use a dovetail when the joint itself should carry alignment and resist shear, for example on large props, helmets, or parts that are assembled and disassembled. Use a planar cut with dowels or magnets when you want an invisible seam on an organic surface.
Does Separate by Color work on STL files?
No. STL stores geometry only, so there are no color regions to select. Separate by Color needs a 3MF that was painted in Bambu Studio, Orca Slicer, or PrusaSlicer. For a single-color STL, use Smart Detach to click a feature or one of the plane-based cuts.
Which connector type should I choose?
Plugs and dowels are the default for glued halves. Magnets suit accessories you want to remove again. Snap-fits click together and resist pull-out, and pin holes take a metal rod or bamboo skewer. Print a short tolerance test in your usual filament before committing to a large part.
Can I undo a cut or make several cuts on one model?
Yes. A committed cut or detach, including any connectors placed on it, can be undone with Ctrl+Z. You can also keep cutting: split a body with a planar cut, detach a chimney or arm with Smart Detach, then add connectors to each new face. Every resulting piece appears in the parts list and can be exported on its own.
See how Multipart3D stacks up in the 2026 STL splitter comparison, read the general FAQ, or learn about the project.